


October 21, 2025 / Blog / By administrator
Vape Kit Troubleshooting: How to Fix Leaking Tanks and Flooding Issues
Numerous surveys of e-cigarette users indicate that 72% have experienced leaks, and 45% admit to abandoning their beloved pod kits due to frequent leaks. Even more frustrating, the average user wastes 15 ml of e-liquid per month due to leaks, accumulating to 60-90 ml per year. Furthermore, spills are equally common. As a vape brand, we not only provide personalized, intelligent vape kits but also help more e-cigarette users resolve these issues. Regarding both matters, 90% of vape kit leaks and spills can be resolved with simple steps.
Vape Kit Leaks vs. Spills: What is the Difference?
Before troubleshooting, you need to distinguish between leaks and spills—they each have different causes and solutions. Failing to distinguish between these two types of issues can lead to wasted time and ineffective solutions:
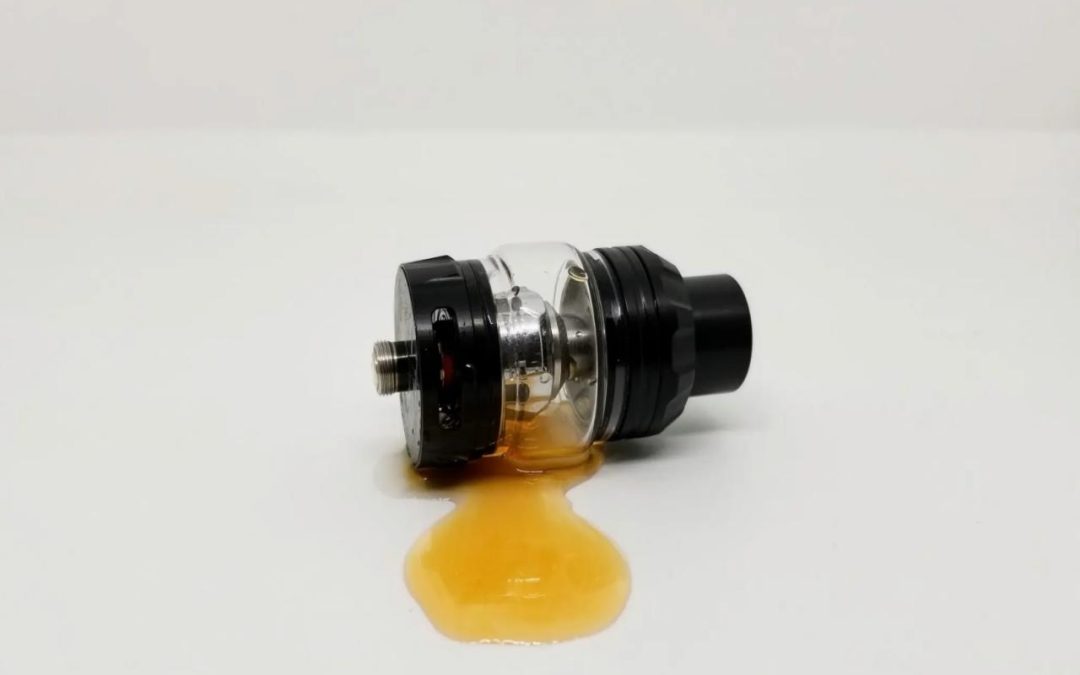
Vape Kit Leaks: Liquid leaks from the reservoir or cartridge onto your hands, pockets, or bag. Leaks occur when liquid leaks through the air inlet, the reservoir breaks, or a connection becomes loose. Common signs: sticky residue on the vape kit, liquid pooling at the bottom, or an unexpectedly low liquid level.
Vape spillage: Liquid fills the coil chamber too quickly, causing gurgling noises, puffing, or weak vapor. Spillage does not leak outward, but rather creates an internal mess. Common signs: a “wet” smell when drawing, decreased vapor volume, or a damp coil.
In actual use, if your pod kit leaves a sticky trail in your pocket, it’s leaking. If it makes a gurgling sound and sprays liquid into your mouth during use, it’s leaking.

Vape Kit Leaks: Top Reason 1—Overfilling
The top reason for vape kit leaks is overfilling. When you fill the e-liquid above the “maximum” fill line, there’s no room for air. This pressure pushes the e-liquid into the airflow holes or coil chamber, causing a leak. In this case, remove the reservoir/cartridge from the battery. Tilt the kit on a paper towel to drain excess liquid from the air intake. Wipe the inside and outside of the reservoir/cartridge with a clean paper towel. Reinstall the reservoir/cartridge and resume regular use. The leaking should stop within 1-2 puffs.
To prevent overfilling, always fill to the “MAX” mark and never exceed it. Also, for some cartridge kits with transparent reservoirs, hold the cartridge at eye level when filling to avoid overfilling.
Top Cause 2 – Loose Connections or Damaged Seals
The second most common cause of vape kit leaks is loose threads or worn O-rings. O-rings dry out or crack over time, and the reservoir connection can loosen with daily use, creating gaps that can lead to leaks. The solution is usually to unscrew the reservoir from the battery and the reservoir cap from the base. Wipe all threads with a dry paper towel, as debris or old e-liquid can affect the seal. Also, screw the top cap firmly back onto the reservoir base, but do not overtighten. Then reinstall the reservoir onto the battery, tightening gently but firmly.
Inspect and replace the O-rings. Inspect the O-rings on the reservoir cap and base. Check for cracks, tears, or dryness. If damaged, replace them with spare O-rings. Before installing a new O-ring, lightly apply a small amount of e-liquid to it. This will maintain its flexibility and create a better seal.
Liqueflash: Causes and Step-by-Step Fixes
Liqueflash occurs when too much e-liquid enters the coil’s absorbent material. This is usually caused by improper coil preheating, low wattage, or continuous puffing.
Repair Method 1: Clear excess e-liquid from the coil, remove the reservoir/cartridge from the battery, and remove the coil. Turn the reservoir upside down and gently tap it on a paper towel to remove any excess liquid from the coil cavity. Use a paper towel to remove any lint from the coil, being careful not to squeeze it, as this will damage the wick. Meanwhile, reinstall the coil, connect the reservoir, and perform 3-5 dry puffs to ensure the liquid is evenly absorbed into the wick.
Fix Method 2: Adjust the wattage. Coils have a recommended wattage range. If you vape below this range, the coil won’t heat up enough to vaporize all the liquid, resulting in spills. Therefore, increase the wattage to the middle of the coil’s recommended range.
Fix Method 3: Avoid continuous puffs. Taking more than five puffs in a row prevents the wick from reabsorbing the liquid, leading to spills. Pause for 10-15 seconds between puffs to allow the wick to absorb the liquid.
Maintain your device to prevent leaks and spills long-term.
While troubleshooting is essential, regular maintenance can keep your vape kit leak- and spill-free for months. Therefore, you can clean your vape kit weekly by removing the reservoir/cartridge, atomizer coil, and O-ring. Rinse the reservoir/cartridge with warm water to remove any residual e-liquid. Dry thoroughly before reassembly.
Store your vape kits properly, keeping them upright and not on their sides or upside down. This prevents e-liquid from seeping into the air intake. Avoid extreme temperatures. For example, high temperatures can cause e-liquid to expand, while low temperatures can cause it to thicken. According to our customer data, following this procedure can reduce troubleshooting by 80%.
Efficiently resolve leaks and spills
Reservoir leaks and spills won’t necessarily ruin your vaping experience, but they can affect your overall experience. By identifying the root cause, such as overfilling, loose seals, or low power, and following regular maintenance procedures, you can keep your vape kit running smoothly. Remember: 90% of problems can be resolved in just 5 minutes.